Tel: +86-18065255079 E-mail: wulixia@vameitulvye.com
Whatsapp:+86 15260985928
English
- All
- Product Name
- Product Keyword
- Product Model
- Product Summary
- Product Description
- Multi Field Search

Views: 0 Author: Site Editor Publish Time: 2026-09-23 Origin: Site


The long-term performance of any fenestration system is dictated entirely by the quality of its installation. Improper execution introduces immediate failure points across the building envelope, leading to active water ingress, severe thermal bridging, and compromised structural integrity. Failing to adhere to strict framing and sealing guidelines will also instantly void manufacturer warranties. We provide a standardized, evidence-based framework for flawless execution. You will learn the exact protocols for rough opening preparation, advanced weatherproofing, structural fastening, and final operational calibration. Mastering these steps ensures your fenestration performs exactly as engineered, keeping the elements out and maintaining smooth sash operation for decades. A proper aluminum sliding window installation requires precision, patience, and a thorough understanding of building science principles.
Preparation is Non-Negotiable: Verifying that the rough opening is plumb, level, and square prevents operational binding and uneven seal compression.
Moisture Management is Critical: Proper integration of sill pan flashing and compatible sealants protects the building envelope from water infiltration.
Material Compatibility Matters: Utilizing the correct fasteners prevents galvanic corrosion, a common risk when securing aluminum frames to different substrates.
Manufacturer Tolerances Dictate Success: Sourcing a custom aluminum window from a reputable manufacturer ensures precise fitment and reduces on-site modification risks.
A successful sliding window installation begins long before the unit is lifted into place. The rough opening must meet strict baseline requirements. Smooth sash operation and airtight weather seals depend entirely on a perfectly square frame. Any deviation in the framing transfers directly to the aluminum extrusion. This causes the tracks to bind, the rollers to drag, and the weatherstripping to gap. You cannot force a rigid metal frame into a racked opening without causing permanent damage to the unit.
Unbox and inspect the unit immediately upon delivery. Instruct your installation team to examine the frame for shipping damage. Run your hands along the nailing fin to check for micro-bends that will push the frame out of plumb. Inspect the factory finish for scratches or abrasions down to the bare metal. Perform this inspection before removing any existing windows. Discovering a manufacturing defect after demolition halts the entire project and leaves the building exposed to the elements. Verify that the weep holes are punched cleanly and free of aluminum shavings.
Installation methods vary based on the specific project scope. New construction windows utilize an integrated nailing fin. They attach directly to the exterior sheathing before the siding or weather-resistant barrier (WRB) is applied. Retrofit applications typically use a block frame or a flush fin. These are designed to fit inside existing window frames without disturbing the exterior cladding. This technical guide focuses strictly on the standard nailing fin method used in new construction and full tear-out scenarios, as it provides the most reliable water management system.
Measure the rough opening diagonals to verify the geometry. Pull a heavy-duty tape measure from the top-left corner to the bottom-right corner. Repeat this from the top-right to the bottom-left. These two measurements must match within 1/8 inch. This confirms the opening is perfectly square. Check the sill and side trimmers for plumb and level conditions using a 4-foot or 6-foot spirit level. A short torpedo level will not bridge the bows in warped framing lumber. The acceptable tolerance is 1/16 inch per foot. Maintain a standard 1/2-inch clearance gap overall. This provides exactly 1/4-inch per side to accommodate composite shimming and natural thermal expansion.
Rough Opening Tolerance Checklist | ||
Measurement Parameter | Maximum Allowable Deviation | Field Correction Method |
|---|---|---|
Squareness (Diagonals) | 1/8 inch difference | Re-frame or adjust trimmers |
Sill Level | 1/16 inch per foot | Install tapered composite shims |
Jamb Plumb | 1/16 inch per foot | Shim behind nailing fin or adjust framing |
Header Sag | 0 inches (Must be perfectly straight) | Replace header or install temporary support |
Proper execution requires specific hardware and professional-grade tools. Do not substitute materials based on convenience. Using the wrong fasteners or sealants will cause systemic failures.
Corrosion-resistant fasteners (304 or 316 stainless steel pan head screws, #8 x 1-1/2 inch)
Composite building shims (wood shims compress, absorb moisture, and rot over time)
Flexible flashing tape (butyl or acrylic-based adhesive, minimum 4 inches wide)
High-quality polyurethane or neutral-cure silicone sealant (AAMA 800 compliant)
Self-leveling laser level or 4-foot spirit level
Framing square and heavy-duty tape measure
Impact driver with an adjustable torque clutch to prevent over-driving
Professional drip-free caulk gun with a high thrust ratio
Heavy-duty suction cups for safe glass handling
Low-expansion window and door foam (AAMA 812 compliant)
Cross-reference the physical window dimensions against the provided technical spec sheet. Measure the actual aluminum frame width and height on the ground. Do not rely solely on the printed box label. Exact fitment prevents structural stress and eliminates the need for emergency on-site reframing. If the rough opening is too small, you must re-frame it. Never attempt to grind down or modify the aluminum extrusion to force a fit.
Proper flashing separates a compliant, durable installation from one prone to catastrophic failure. Water will eventually breach the primary exterior cladding. Your flashing strategy serves as the secondary defense mechanism. It manages this moisture and directs it back outside. This prevents structural wood rot, interior drywall damage, and toxic mold proliferation. The principle of "shingle fashion" must dictate every layer of your weatherproofing.
Create a positively sloped sill to direct water outward. Use a piece of beveled cedar siding or install a specialized rigid plastic sill pan. Apply flexible flashing tape across the entire sill plate. Extend the flashing tape up the side jambs a minimum of 6 inches. Overlap the exterior sheathing by at least 2 inches over the face of the wall. Cut small "bow-tie" patches of flashing tape to reinforce the bottom corners where the sill meets the jambs. Press the tape firmly with a J-roller to remove trapped air bubbles and activate the pressure-sensitive adhesive. Relying on hand pressure alone will result in poor adhesion and eventual water leaks.
Chemical compatibility between sealants and metal is mandatory. Incorrect sealants will degrade the aluminum finish over time. Use high-grade polyurethane or neutral-cure silicone. Never use acid-curing silicones, as the acetic acid reacts aggressively with the anodized or powder-coated aluminum finish. Apply a continuous 3/8-inch bead of sealant directly onto the wall sheathing or the back of the nailing fin. Utilize the standard "horseshoe" sealant pattern. Run the sealant up both side flanges and across the top header flange. Leave the bottom sill flange completely free of sealant. This gap allows any trapped internal water to drain outward freely.
Sealant Compatibility and Application Guide | |||
Sealant Type | Aluminum Compatibility | Flexibility | Recommended Application Area |
|---|---|---|---|
Neutral-Cure Silicone | Excellent | High | Nailing fin back-bedding, exterior perimeter joints |
Polyurethane | Excellent | Very High | Rough opening gaps, structural sealing |
Acid-Cure (Acetoxysilane) | Poor (Causes Corrosion) | Medium | Do not use on aluminum fenestration |
Acrylic Latex | Fair | Low | Interior cosmetic gaps only |
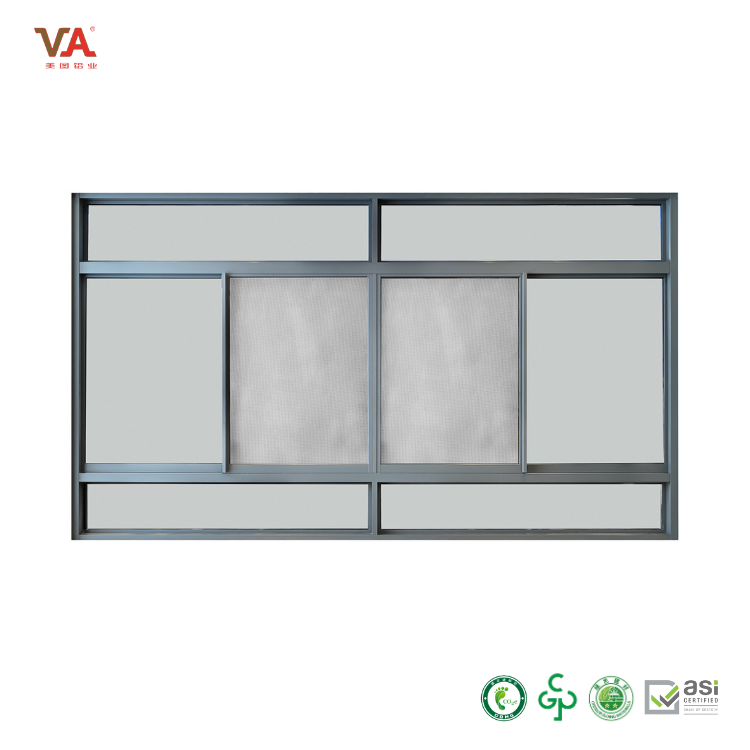
Break down the physical installation into sequential, verifiable steps. Do not rush the sequence. Verify plumb, level, and square metrics after every single step. A mistake in step two will compound into a massive failure by step five.
Remove the operable sliding sash prior to lifting the frame. This reduces the overall unit weight significantly. It also prevents accidental glass damage during maneuvering. Lift the bare aluminum frame into the rough opening temporarily. Verify the 1/4-inch clearance on all four sides. Mark your preliminary shim locations on the framing studs using a carpenter's pencil. Remove the frame carefully to apply your exterior sealants. Never attempt to apply back-bedding sealant while the window is sitting in the opening.
Insert the window into the rough opening from the exterior. Press the nailing fin firmly into the horseshoe sealant bead to create a watertight gasket. Place composite shims directly at the sill. Ensure the sill track remains perfectly level across its entire span. Place additional shims at all designated fastener locations along the side jambs. Add support shims directly under the meeting rail. This prevents the frame from distorting downward when the heavy glass sash operates. Do not place shims directly above the head jamb. If the building settles and the header sags, it needs that 1/4-inch gap to deflect without crushing the aluminum frame.
Follow the manufacturer's specific fastening schedule. Typically, you will drive fasteners every 8 to 12 inches along the nailing fin perimeter. Start at the upper corners to secure the unit, then work your way inward and downward. Check the frame for square continuously during this process by measuring the diagonals again. Do not over-tighten the screws. Use pan head screws, not bugle head drywall screws. Bugle heads will bite into the aluminum fin, distort the metal, and bow the rigid frame inward. A bowed frame restricts slider movement and permanently breaks the factory weather seals.
Seat the sliding sash back into the fully secured frame. Lift the sash upward into the top channel first. Push it up fully to clear the bottom track lip. Swing the bottom of the sash inward carefully. Drop the rollers gently onto the raised bottom track. Slide the sash back and forth multiple times. Verify that the track engages smoothly without grinding or heavy resistance. Look at the "reveal"—the vertical gap between the edge of the sash and the side jamb. As you close the window, this gap should remain perfectly parallel from top to bottom. If it is wider at the top or bottom, your frame is out of square.
Align the exterior screen track carefully. The aluminum sliding window with mosquito screen requires precise tension calibration. Insert the top edge of the screen frame into the upper outer channel. Compress the spring-loaded top guides fully. Swing the bottom of the screen inward and seat the rollers onto the lower track. Adjust the bottom tension screws if the screen binds, rattles, or derails during operation. A properly tensioned screen should glide with minimal effort and remain seated during high winds.
Physical installation steps directly dictate your operational outcomes. A perfectly level sill ensures a frictionless glide. Plumb side jambs guarantee an airtight seal when the window is locked. Calibration turns a static frame into a high-performance system. You must verify these mechanics before the interior drywall and exterior siding are installed.
Access the roller assemblies located at the bottom corners of the sliding sash. Locate the small adjustment holes on the lower frame edge. Insert a Phillips-head screwdriver into the adjustment port. Turn the screw clockwise to raise the sash height. Turn it counterclockwise to lower the sash. Adjust both sides independently to ensure parallel alignment with the outer frame. The sash must contact the side jamb evenly from top to bottom when closed. If the rollers are set too low, the bottom of the sash will drag directly on the aluminum track, destroying the weatherstripping and scoring the metal.
Identify the factory-drilled weep holes on the exterior sill track. Verify they are completely clear of obstructions. Remove any stray debris, excess sealant, or construction dust using a small wire. Test the drainage system by pouring a small amount of water into the interior sill track. Watch the exterior weep holes to ensure the water drains out immediately. Ensure the exterior siding or trim does not block these drainage paths. Blocked weep holes trap rainwater in the track, eventually forcing it over the interior sill and into the wall cavity.
Common field pitfalls easily compromise the integrity of the installation. Recognizing these structural and chemical risks prevents catastrophic building failures down the line. Construction is an unforgiving environment for precision fenestration.
Actual framing conditions rarely match architectural blueprints perfectly. You will frequently encounter bowed wall studs, out-of-level sills, or settling structures. Consult the manufacturer's technical support team for severe deviations. Do not improvise structural modifications on the fly. Cutting into the aluminum extrusion or altering the nailing fin compromises structural integrity and water resistance. If a stud is severely bowed, cut it out and replace it rather than trying to force the window to conform to bad framing.
Aluminum is a highly conductive material. It transfers exterior heat and cold rapidly into the building interior. You must maintain the thermal break within the rough opening gap. Apply professional low-expansion polyurethane foam insulation in the shim space. Fill the cavity completely but carefully. Use a professional foam gun with an adjustable flow dial. Do not use high-expansion foam under any circumstances. High-expansion foam generates massive pressure as it cures, which will bow the aluminum frame and permanently bind the sash. Avoid using fiberglass batt insulation in this gap, as it allows air infiltration and holds moisture against the framing.
Dissimilar metals react aggressively when exposed to ambient moisture. Standard zinc-plated steel screws react with aluminum frames. This chemical reaction causes galvanic corrosion. The steel fasteners will rust, expand, and eventually shear off, leaving the window unsecured. Prevent this by using specific isolation techniques. The most effective mitigation strategy is utilizing high-grade 304 or 316 stainless steel fasteners exclusively for all aluminum fenestration attachments. Do not let copper flashing or lead-based materials come into direct contact with the bare aluminum.
Manufacturers outline highly specific flashing and sealing guidelines in their technical manuals. Failure to follow these exact instructions carries heavy financial penalties. It will immediately void the product warranty. Always document your flashing and sealing process with high-resolution photos before the exterior cladding is installed. Take pictures of the sill pan, the horseshoe sealant application, and the final flashing tape layers. This provides undeniable proof of compliance if a warranty claim arises years later.
Evaluating the source of your building materials is a project management requirement. Consistent manufacturing quality reduces on-site labor costs and eliminates installation bottlenecks. Poorly manufactured windows will fight you at every step of the installation process.
Precision engineering at the manufacturing level pays massive dividends in the field. It reduces on-site labor drastically. Tight factory tolerances minimize shimming complexity and ensure the sash fits the frame perfectly. This reduces post-installation adjustment time. Partner with a proven aluminum window manufacturer to guarantee these exact tolerances across your entire order. Look for manufacturers that utilize heavy-duty extrusion walls and thermally broken frames poured with high-density polyurethane.
Retrofitting a standard-size window into an older building presents massive challenges. It often requires extensive rough opening modification. You will spend hours reframing studs, adjusting headers, and patching interior drywall just to make a stock window fit. Ordering a custom aluminum window solves this problem entirely. The unit is engineered and tailored to the exact existing dimensions of your rough opening. This eliminates structural rework, reduces labor costs, and accelerates the overall project timeline.
Measure your existing rough openings down to the 1/16th of an inch to ensure accurate ordering and eliminate the need for on-site reframing.
Request detailed technical specification and flashing sheets for your selected window models to verify sealant compatibility.
Consult with a certified manufacturer to discuss custom sizing options for unique rough openings and specific thermal requirements.
Schedule a professional site assessment to identify potential structural sagging or moisture damage in the framing before demolition begins.
A: Yes. Building codes and best practices mandate a sill pan. It acts as the primary moisture management system at the base of the rough opening. A properly sloped sill pan captures any water that bypasses the window frame and directs it safely outward, preventing structural wood rot.
A: Locate the adjustment holes at the bottom corners of the sliding sash. Insert a Phillips screwdriver into the port. Turn the screw clockwise to raise the sash and counterclockwise to lower it. Adjust both sides until the sash aligns perfectly parallel with the side jamb.
A: The best options are high-grade polyurethane or neutral-cure 100% silicone sealants. These provide maximum flexibility and excellent adhesion. Never use acid-curing silicone, as the acetic acid will aggressively corrode the aluminum finish and compromise the seal.
A: Yes, this is standard practice. However, you must use proper flashing tape to separate the aluminum from the raw wood. Additionally, you must use stainless steel fasteners to prevent galvanic corrosion between the dissimilar materials when exposed to moisture.
A: Stand outside and hold the screen frame by the sides. Insert the top edge into the upper exterior track channel. Push upward to compress the spring-loaded top rollers. Swing the bottom edge inward and gently seat the bottom rollers onto the lower track lip.
A: Yes, unauthorized drilling generally voids the manufacturer's warranty. Drilling can penetrate internal drainage channels, block weep holes, or compromise the thermal break. Always consult the manufacturer's technical manual before making any structural modifications to the extrusion.
A: New construction windows feature a nailing fin that attaches directly to the exterior wall sheathing before siding is installed. Retrofit windows use a block frame or flush fin designed to slide directly into an existing window frame, eliminating the need to remove exterior cladding.


